Have you ever wondered how those romantic photos with colorful hearts floating on them are taken? I have. And I've always thought they were done using some photo software until I stumbled upon a website that shows you how to do it. This effect is called Bokeh, which is a word adapted from the word 'blur' in Japanese. In photography this term is used to describe the quality of the areas in the picture which are not in focus. And it can be easily done cheap and easy, with a bit of cutting & sticking plus some patience for trial & error. Really. And I'm not even a trained photographer.
The above photos in the collage is achieved using my Canon S5IS. I'm so excited I managed to get it on my first trial and I'm gonna share this with you!
The above photos in the collage is achieved using my Canon S5IS. I'm so excited I managed to get it on my first trial and I'm gonna share this with you!
What you will need:
a camera with large aperture lens
black paper
tape
penknife
paper puncher with various shapes (optional)
STEP 1
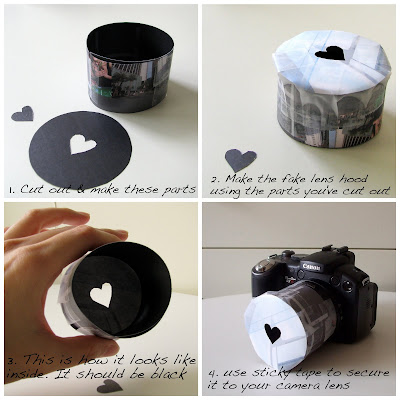
Cut a circle slightly larger than the size of your lens and cut any shape about the size of 15mm in the center. Here, I've cut a heart shape. You may use a paper puncher if you like.
Note: If the paper you used is not black on both sides like mine, make sure that the black side is on the inside.
STEP 2

Step 3
My camera was set to Shutter Speed 1/4 or 1/5 and Aperture set to the lowest your camera can go, e.g. 2.7 (mine was about 3.5) when I achieved that effect. And make sure you zoom all the way out till you don't see a card with a hole in the middle in your view finder. Then try to shoot something very far away, preferably with strong lights like streetlights, candle lights, fairylights or traffic lights, car headlights etc.
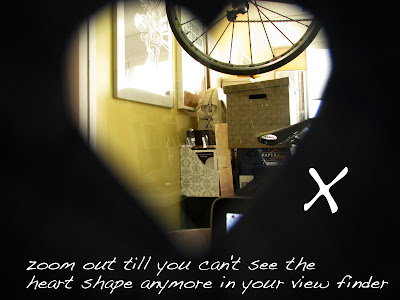
Tip: If you still see an image like the one shown in the photo below in your view finder, zoom out more, till you can't see the heart shape anymore.

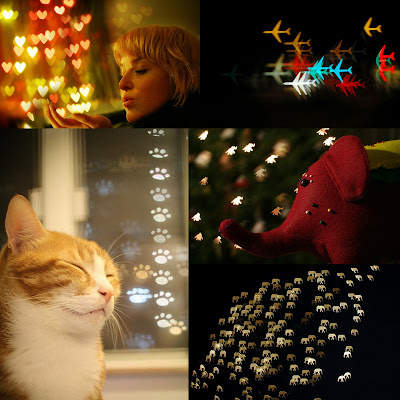
Here are some examples from others using different cut out shapes, which you can easily achieve with paper punch with different shapes.

I'm by no means a trained photographer, so for more technical details, please refer to this website on how to create a bokeh.
Now go try it out and come back to tell me how it went! Have fun!
Note: If the paper you used is not black on both sides like mine, make sure that the black side is on the inside.
STEP 2

Step 3
My camera was set to Shutter Speed 1/4 or 1/5 and Aperture set to the lowest your camera can go, e.g. 2.7 (mine was about 3.5) when I achieved that effect. And make sure you zoom all the way out till you don't see a card with a hole in the middle in your view finder. Then try to shoot something very far away, preferably with strong lights like streetlights, candle lights, fairylights or traffic lights, car headlights etc.
Tip: If you still see an image like the one shown in the photo below in your view finder, zoom out more, till you can't see the heart shape anymore.

Here are some examples from others using different cut out shapes, which you can easily achieve with paper punch with different shapes.

I'm by no means a trained photographer, so for more technical details, please refer to this website on how to create a bokeh.
Now go try it out and come back to tell me how it went! Have fun!


No comments:
Post a Comment